Dads MGB Powered Morris Oxford
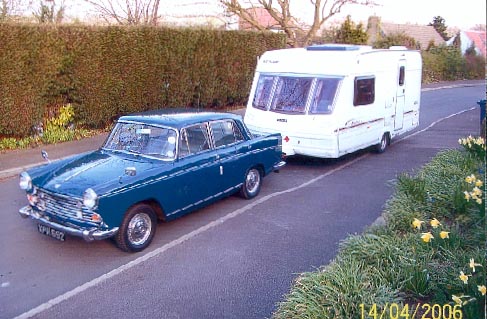
Dads new tow vehicle for his caravan.
Dad used to tow his caravan with the 2 litre powered Morris Minor convertible that we built for him ( HERE ) but due to the actual size of the car (not the power) he was limited to the size of caravan he could tow. As Mum and Dad wanted a bigger caravan they needed a bigger classic car to tow it with. Many years ago Dad used to have a Wolseley 1660 (which is the same as an Oxford) with which he used to tow a very big and heavy caravan so he thought this would be a good idea for a new tow car. The Morris Minor was advertised on my website and bought unseen by an English man living in Hollywood. We told Dad to buy the best car he could and forget about the cost. He found a very good car but he was disappointed with the way the car towed with its stock 1600cc B series engine, it lacked power and torque. I think he was spoilt with the superb Fiat engine in the Minor and when he used to tow with the Wolesley many years ago the pace was slower on the roads and the power of cars less.
So we came up with a plan to fit an 1800cc MGB engine. My philosophy when building cars is that reliability is number 1, I prefer low down torque to out and out power and if possible keep things simple. Therefore the engine would be rebuilt and optimised for torque. The best way to get torque is to increase capacity so while I was rebuilding the engine we went for a large overbore to just under 2 litres. We also decided to use the MGB gearbox without overdrive. I was worried that the over drive is more complication and something else to go wrong. I would have gone for a 5 speed gearbox conversion before an overdrive.
SPECIFICATION
| Car | Morris Oxford |
|---|---|
| Engine | Late MGB 5 bearing crank, over bored, reground crank, block mains align honed, reconditioned connecting rods, ARP conrod bolts, new cam bearings, cylinder head converted to unleaded, 3 angle valve seats, basic porting, new standard cam, new standard oil pump, new standard rocker gear, new standard timing gear, rebuilt twin HIF SU carburetors, K&N air filters in Morris Minor air filter cases. Power 82bhp at the wheels at 4,000rpm with lots of torque. |
| Radiator | Morris Oxford with uprated core. Fiat 132 electric fan. |
| Gearbox | Reconditioned MGB 4 speed. Shortened gear stick remote. MGB clutch master and slave cylinder. |
| Propshaft | Oxford with MGB reverse sleeve yoke modified by Dunning and Fairbank |
| Exhaust | MGB cast manifold with modified MGB down pipes, home made system with Dynomax silencer |
| Suspension | Uprated rear leaf springs. |
| Brakes | Standard |
| Body Modifications | Small part of the bulkhead cut back to clear the back of the engine. Gearbox tunnel enlarged. |
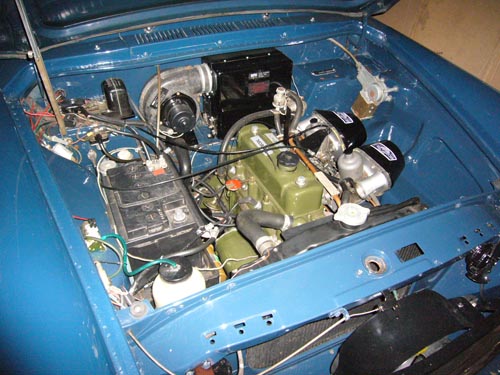
The MGB Engine in the Morris Oxford.
We tried to keep the installation looking "factory". In otherwords this engine could have been an option from the factory.
-------------------------------------------------------------------------------------
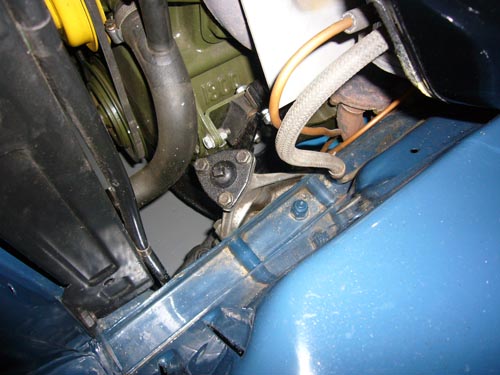
The Morris Oxford Engine Mounts.
The front engine mounts were simple. The Oxford front plate was fitted to the MGB engine then the Oxford mounting towers and rubbers were used.
-------------------------------------------------------------------------------------
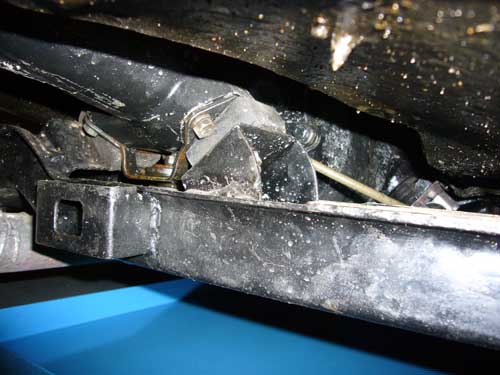
The Modified Oxford Gearbox Crossmember
At the rear things were not so simple. The Oxford crossmember was used but the mounts under the gearbox mounting rubbers were lowered into the crossmember. People advised us that the way to fit the MGB gearbox was to space the whole crossmember away from the chassis legs..........
-------------------------------------------------------------------------------------
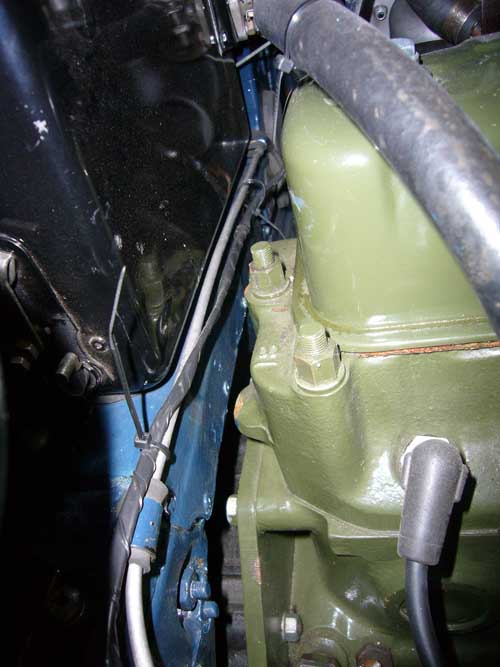
Rear Of Engine and Bulkhead
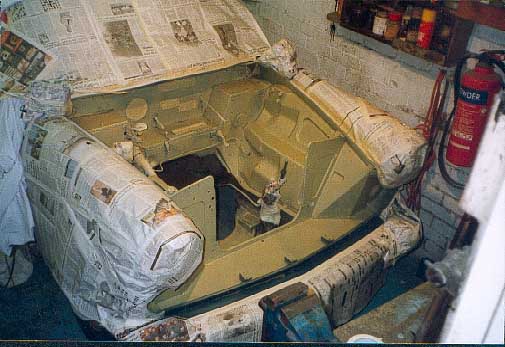
At the rear of the engine, the backplate and bolts were very close to the bulkhead. However the main problem was actually fitting the engine and gearbox. Due to the suspension crossmember more space is actually required at the bulkhead to get the engine in position. The brake pipe that runs across the bulkhead was also moved up to get it out of the way.
-------------------------------------------------------------------------------------
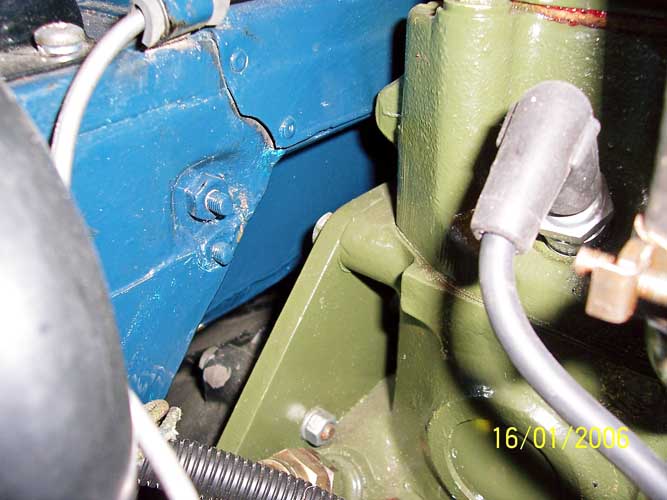
The Cut Bulkhead
A small recess was cut out of the bulkhead to clear the engine backplate. Steel was then welded into the resulting hole.
-------------------------------------------------------------------------------------
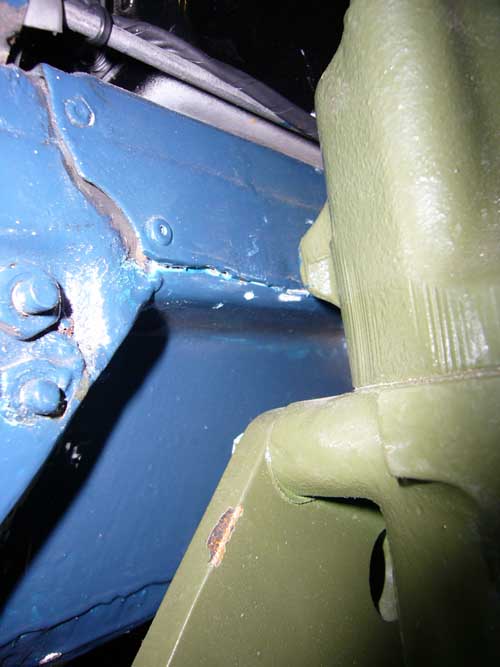
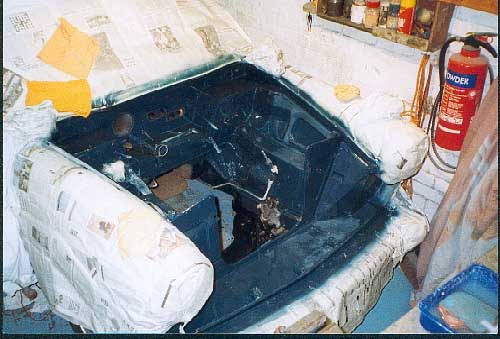
The Cut Bulkhead
Here you can see how the bulkhead has been recessed.
-------------------------------------------------------------------------------------
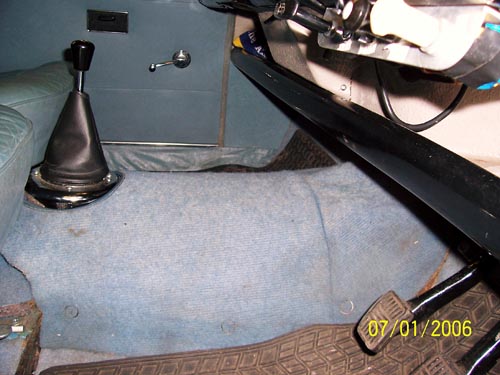
The Gear Stick Extension.
The gearstick would have been in the bench seat so the extension was shortened.
-------------------------------------------------------------------------------------
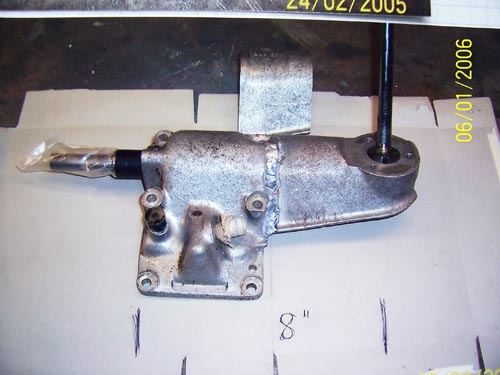
The Shortened Gearstick Extension.
The inner part was also remachined to suit.
-------------------------------------------------------------------------------------
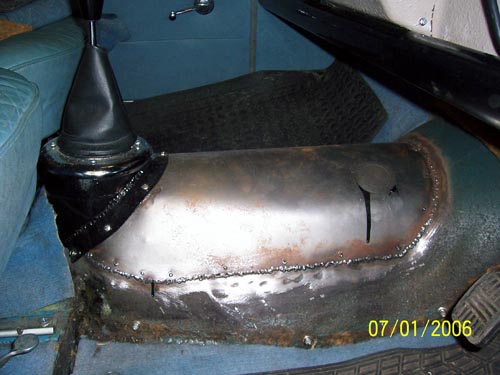
Gear Stick Fitted To The Car
-------------------------------------------------------------------------------------
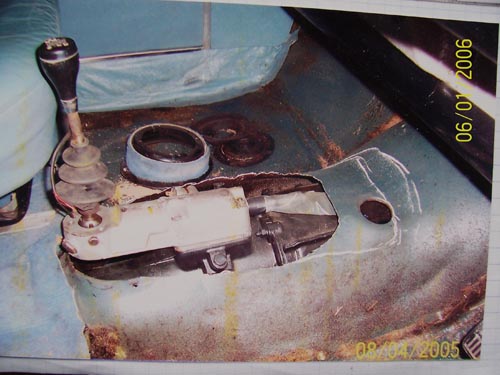
Modified Gearbox Cover
The gearbox tunnel was enlarged by welding a piece of steel on. This was cut and curved to shape then held in place with blind rivets then welded.
-------------------------------------------------------------------------------------
A new bolt on cover for the gearstick was made from the original Oxford item. Rivnuts (threaded blind rivets) were placed in the tunnel so the cover could be screwed into place.
-------------------------------------------------------------------------------------
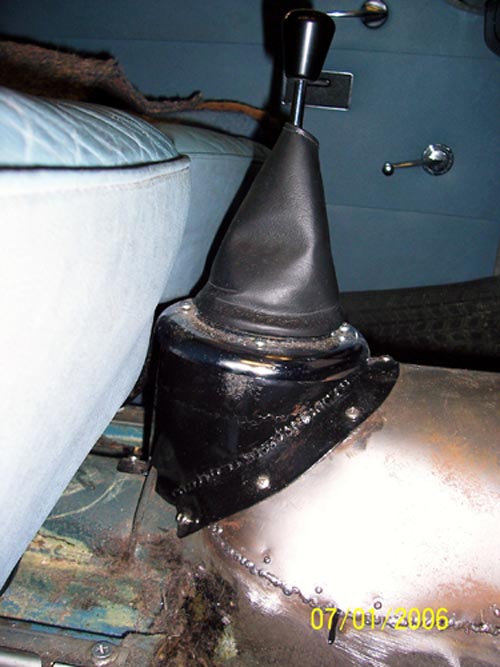
Tunnel With Carpet.
When the carpet is put over the tunnel it looks factory.
-------------------------------------------------------------------------------------
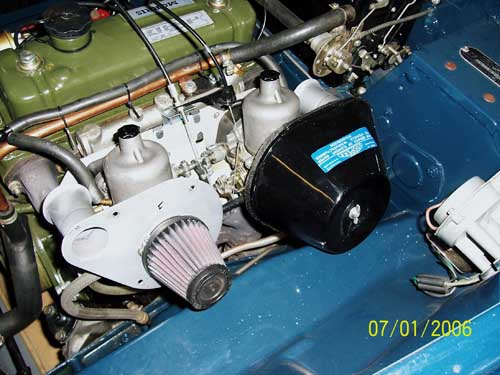
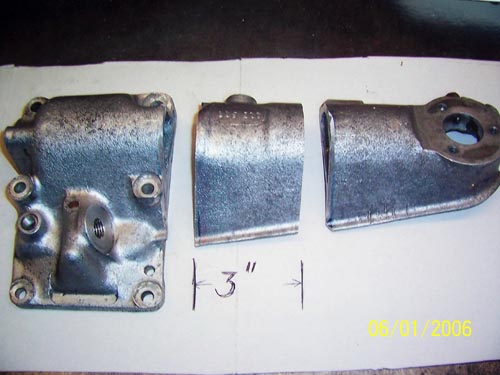
The K&N Airfilters
I only use K&N airfilters on my engines but we wanted to keep the engine looking reasonably stock. So I used 2 Morris Minor air filter cases and fitted clamp on K&N filters inside. I made new back plates with inlet pipes from some DCOE ram pipes I had in stock. The filters may look small but they flow adequate air.
-------------------------------------------------------------------------------------
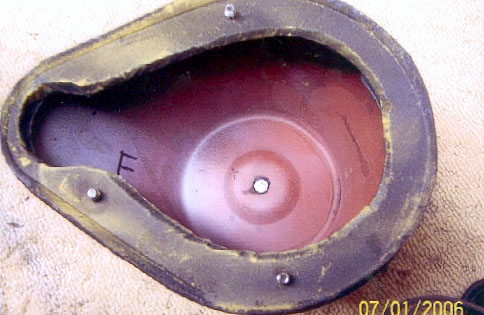
The Inside Of The Filter Case
The Morris Minor filter cases were modified by cutting out the back plate, then welding the back plate to the case. 3 studs were welded on to allow bolting to my new back plate.
-------------------------------------------------------------------------------------
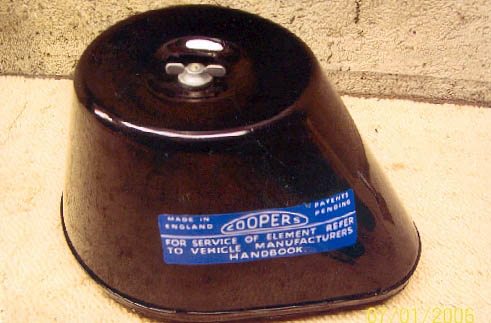
Finished Filter Case
The wingnut is bonded into place for the factory look and the black paint and sticker finish it off.
-------------------------------------------------------------------------------------
The Pedal Assembly
The Morris Oxford uses a mechanical throttle linkage that goes under the dash from right to left. This would have been very difficult to link to the twin SU carbs so I used parts of a Minor pedal and welded it to the Oxford pedal.
-------------------------------------------------------------------------------------
The Piece From The Minor Pedal
This may look simple but a lot of time was spent getting the position correct for the additional part. There was not a lot of space on the bulkhead to accept a cable.
-------------------------------------------------------------------------------------
The Accelerator Cable On The Bulkhead
On the bulkhead to take the outer cable I used a Morris Minor part. Minor parts were used because we had them in stock!
-------------------------------------------------------------------------------------
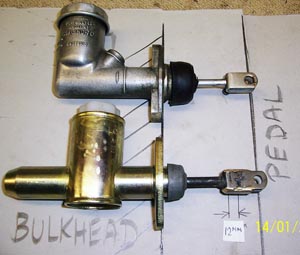
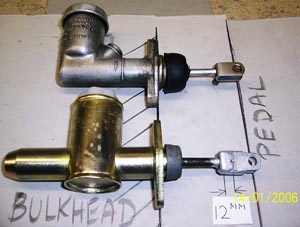
Modifying The Clutch Master Cylinder
Initially we had problems with the clutch. We were using the Oxford master cylinder and the MGB slave. The easy way to cure this was to use all matching MGB parts. So a MGB master cylinder was purchased, but the pushrod was too short so Robin lengthened it.
-------------------------------------------------------------------------------------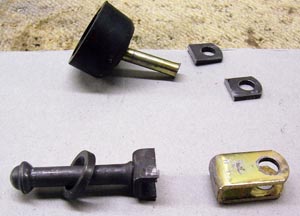
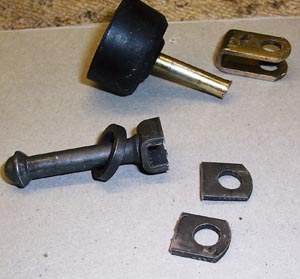
Modifying The Clutch Pushrod
The clevis was cut off the new pushrod and used with the old pushrod.
-------------------------------------------------------------------------------------
The Modified Pushrod
The clevis was brazed onto the original rod and a couple of plates added to strengthen. 12mm was added to its length.
-------------------------------------------------------------------------------------
Painted
A coat of silver paint finishes it off.
-------------------------------------------------------------------------------------
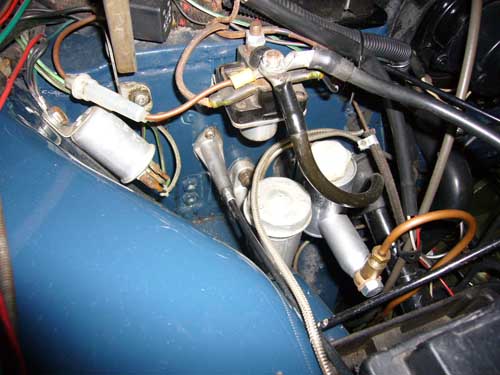
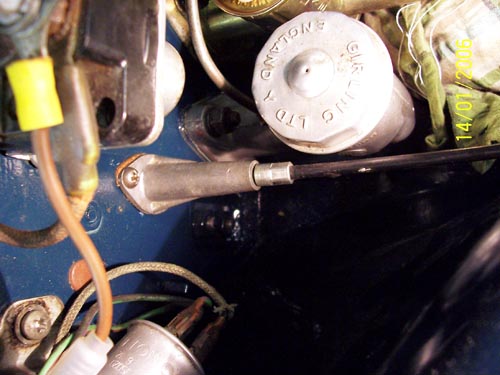
Master Cylinder Fitted
The MGB master cylinder fits onto the bulkhead and a neat banjo fitting is used for the pipe.
-------------------------------------------------------------------------------------
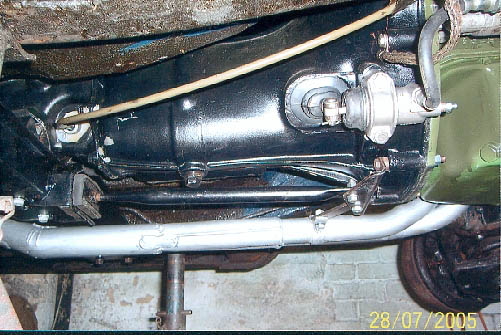
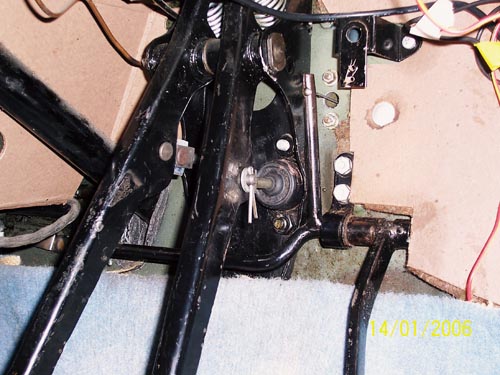
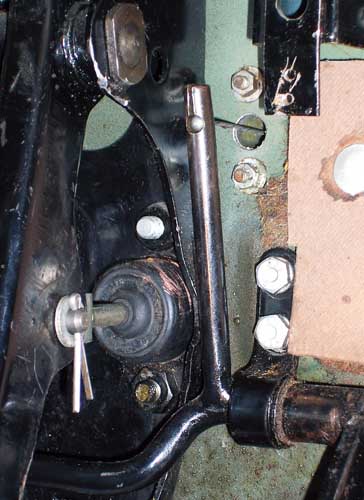
Underneath The Car
The MGB slave cylinder was used. This picture also shows the gearbox restraining rod which prevents the gearbox moving forward under breaking. The exhaust manifold is made so it sits close to the car.
-------------------------------------------------------------------------------------
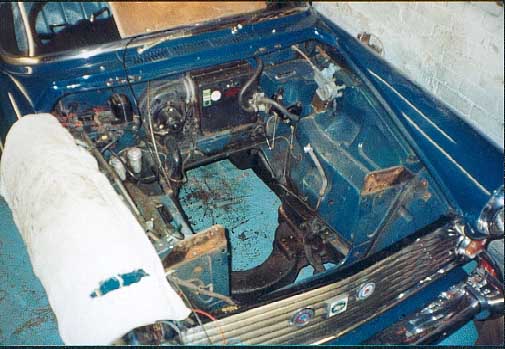
The Engine Bay Being Stripped For a Repaint
While we were fitting the engine Robin decided to tidy up the engine bay. It was OK but not very tidy.
-------------------------------------------------------------------------------------
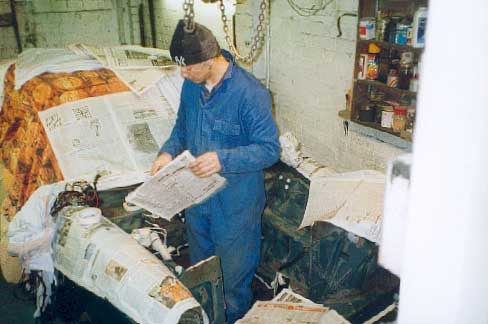
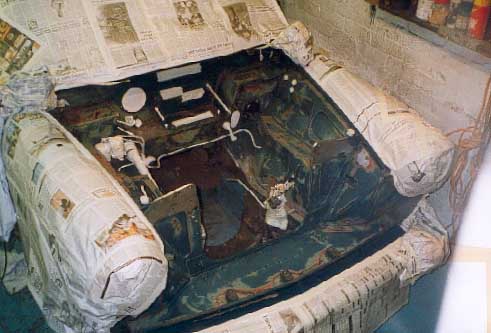
Robin Masking The Engine Bay
Most of the major components were removed from the engine bay before Robin masked out the wings etc.
-------------------------------------------------------------------------------------
Cleaning The Engine Bay
The engine bay was cleaned by hand of all the loose paint, dirt, grease and oil. Then he sand blasted the corners and worse parts.
-------------------------------------------------------------------------------------
The Engine bay In Etch Primer
Etch primer is used for a good key to the metal.
-------------------------------------------------------------------------------------
The Painted Engine Bay
The engine bay was painted in the original blue.
-------------------------------------------------------------------------------------
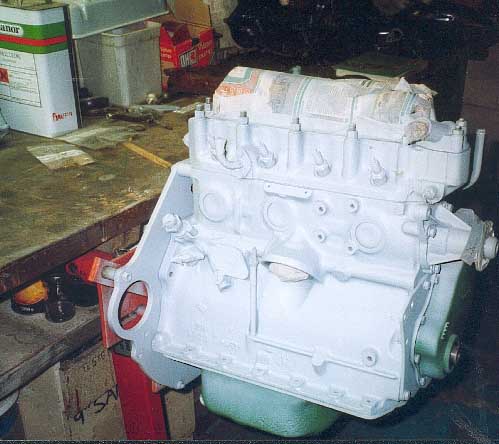
The Engine Block Ready For Paint
I rebuilt the engine to basically stock specs except for an overbore. The engine was completely stripped and Oselli did the machining work. My aim for the engine was reliability and torque. All the modifications carried out were to increase efficiency (such as basis porting, 3 angle valve seats, low restriction air filters and exhaust). A standard cam was used as this would give the torque at the lowest revs. ARP con rod bolts were fitted because the standard ones supplied by Oselli were of such a poor quality that I would not have fitted them to my lawn mower. They had turned threads (all quality fasteners have rolled threads) and the sizes of the shank varied between bolts to such an extent they would not fit into the conrod!
Robin painted the engine block while we were rebuild the engine.
On a local rolling road (all my engines get setup on a rolling road) it gave 82bhp at 4,000rpm at the wheels with lots of torque.
I am very happy with those figures.
-------------------------------------------------------------------------------------
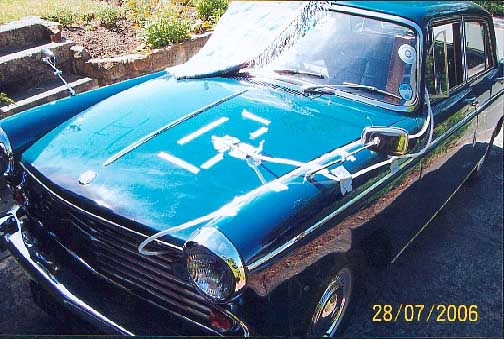
Pressure Testing The Bonnet
As part of our quest for better efficiency we decided to put some louvres in the bonnet to let the air out. The engine bay is now quite full and there is very little space for the air to get out. Many people work on getting air into the radiator but give little thought of where it will go. To ensure we put the louvres in the best place we did a pressure map of the bonnet. We used a U tube with coloured water and put one pipe above the bonnet and one below. We then drove at about 50mph and noted where the greatest pressure differential was. The taped square is the area where the louvres will go.
-------------------------------------------------------------------------------------
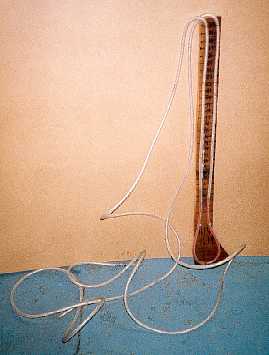
The Manometer
The U tube we used was just clear pipe attached to a piece of wood with graduations. Food colouring is used in water for the liquid. It is important to know which way the water should move to indicate high pressure under the bonnet.