Update 11th February 2004
If you wish to view previous work then links to updates are above. Work before this date was organised in sections (chassis, engine, bodywork etc.) you can see this work by going to "New Project Title Page" above.
All the wings are now made in a carbon, glass composite. They turned out
very well and each one weighs about 1750g, but is stiff enough to do its
job. Robin has sprayed the front wings, boot and front panel. He will start
on the rear wings this weekend.
The fibreglass doors have taken a lot of work to get into a respectable
condition. There were lots of voids behind the gel coat and dry areas of
glass. One day I will make some carbon doors.
I have wrapped the exhaust in insulation (for heat and sound). The expansion
chamber is refitted and is now quiet with the added insulation.
The car is booked for a rolling road tune up to map the engine management
system on the 1st March.
Next jobs are to fit the hood frame and the sprayed body panels. Its getting
close to being on the road!!

Cutting the carbon fibre was quite difficult due to lack of room. Cutting
on
the cardboard enabled me to move the whole lot around to allow me
to easily cut in all directions. The carbon is a 2x2 twill and is quite unstable.
If I had tried to move just the carbon fabris by pulling on it it would have
stretched and distorted.

I was hoping to lay up the wing in one go but due to overhangs I had
to lay it up in stages. Here I am doing the wing lip. I have already done
the
mounting flange. I butted CSM into all the corners to ensure no voids.

This is the rear of the front wing. These are mounting brackets bonded and
then
covered with a layer of carbon.

Here I am offering up the front wing.

The front wing in its position. Notice the small lip by my hand.
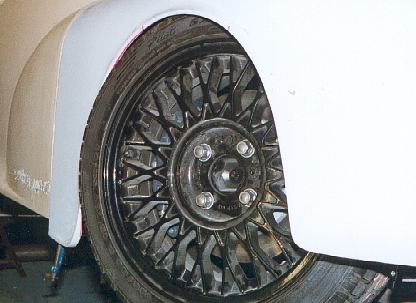
This is the front wheel on full bump. It just clears the wing with lock on.
I hope it will be unlikely that I have full lock and full bump at the same
time.
Notice the bottom of the door with the poor quality finish.

This is looking backwards at the door. The two wing mounting
brackets are visible (this was before they were bonded to the wing)
and the aluminium dirt shield.

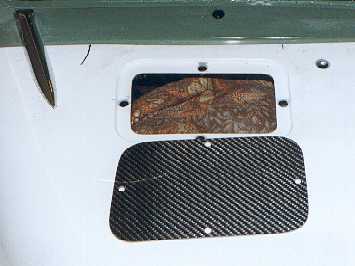
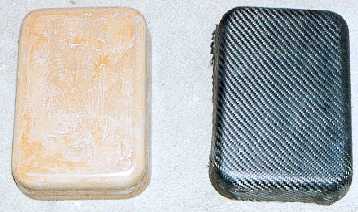
At the front of the front wing I added another removable panel to stop
dirt going onto the headlight.

This is the dirt shield. with the wing in position. I will put
rubber seal onto the edge of the aluminium.

As with the front wing I had to lay up the rear wing in stages.
This is the first stage around the wing lip.
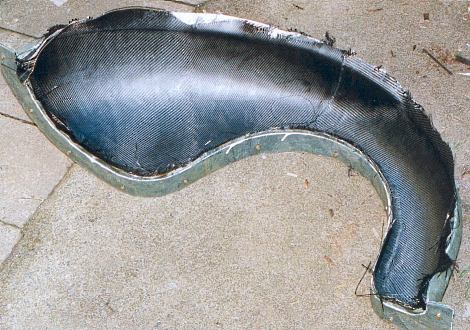
This is the rear wing before I ground off the surplus around the edges and
released it from the mould.
The wing is layed up as follows:- First a thin layer of gel coat, then strips
of 300 gram / metre square
chopped strand matt (CSM glass fibre) into the corners (see above picture).
Then a full covering of 200 g / m sq
2x2 twill carbon, 300g / m sq csm, and finally another layer of carbon. I
used polyester resin
with 1% catalyst in a workshop at around 17 deg C for the main lay up. This
gave me plenty of time.
Once the final layer of carbon was on I squeezed out excessive resin with
a paddle roller and used pieces of
cardboard to scrape the resin off.
The carbon is very drapable and conformed to the curves of the wing very easily.
However
when trying to cut thin strips it would not hold its shape when handled. Carbon
tape is better for
thin strips.

The drivers door did not fit too well. So I had to build it up to get a better
gap
I drew lines on the door and measured out 50mm from where I wanted the glass
fibre. Then after I had built it up it would be easy to mark the desired line.

I stuck a piece of aluminium (not shown here)to the outside of the door, then
painted on gel
coat and built up the rear with CSM. This is before the surplus was removed.

This is the result, a much better door gap. It still
requires final fitting and gapping.

The doors were pretty poor, lots of voids behind the gel coat and dry bits
of csm. The big white patch on the door is a very bad dry area. I ground it
back
to good glass fibre and then layed in wet csm and finally painted gel coat
on top.
I used gel coat to build up the voids on the edges.
I layed up a flat piece of carbon on a sheet of glass for
the cover for the
hole in the bonnet. This is the underside of the panel showing the carbon
weave.
On top is white gel coat.

I used MDF sheet to make templates for the windscreen glass.
Next job is to get the laminated glass cut.
This is a tray to go under the cut out in the bonnet to catch water.
On the left is an MDF mould, I treated this with release agent and layed
the tray on top. The carbon draped over this shape with out cutting tucks.
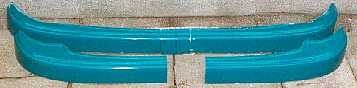
This is the start of the widened front bumper. It is made from a prototype
front spoiler.

I ground tapers on the join and layed up CSM behind.

The front bumper is designed to fit closely to the front panel.
I will make a mould and lay up a carbon bumper from this pattern.

This is the panel that goes next to the exhaust by the passenger. The
aluminium is painted with heat resistant insulating paint, then next
to the expansion chamber is a felt like material, the black is graphite insulation
and finally a thin sheet of very reflective stainless goes on top.

All the insulation materials came from an industrial supplier, much cheaper
than a motorsports supplier.

The finished heat shields. The top one is just covered in aluminium backed
glass fibre. This again came from an industrial supplier.

Because the expansion chamber acted like a big sound box I have
insulated it with heat insulation. This is held on with bolts.

A reader of my website saw I was having problems with gaskets for my
flanges on the exhaust and very kindly supplied a sheet of material.
It is good for 650 deg C and is easily cut with tin snips and holes can be
punched. Thank you very much for helping me out.