There are 10 images on this page
Tips on research. READ THIS WHILE THE PICTURES ARE LOADING.
Building a car is about designing solutions to problems and often many
solutions or ways of doing things are available. So often the problem
is which one to choose. I spend a great deal of time trying to find out
how to do things and what products are available and where to buy them.
Often you know what you want but can not find it.
You must read. Books and magazines ( see recommended reading on the home
page ) are excellent sources of information, as are shows and race meetings.
Often the smaller race meetings are better because you can walk around
the paddock and look at the cars. In the UK hillclimbs and sprints are
relatively free from regulations so the cars are very diverse. Most drivers
are quite happy to talk about their creation so get talking and ask questions.
Trade catalogues and suppliers literature is a wealth of information but
can be difficult to obtain unless you have access to trade magazines.
These publications are aimed at designers and managers and are full of
adverts for useful parts you never knew were available. They also have
a reader enquiry service which makes getting literature very easy, just
be prepared for the sales man to telephone you. Say you are building prototype
one off race cars and have to keep getting fresh ideas and the products
look interesting. Also ask if you can buy direct or can they give you
the name of a local supplier. Suppliers literature often is full of technical
specifications and is really worth the effort to obtain.
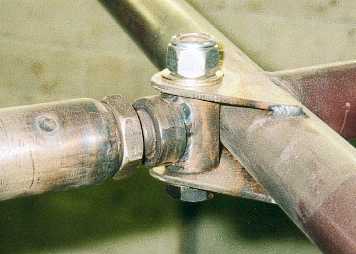
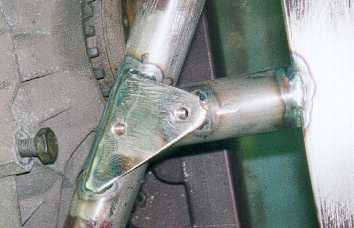
Two removable members
are required in the chassis to enable fitting and removal of the engine
and differential. An adjustable end is put into the tube to allow the
length to be varied in case the chassis moves. ( Accident damage. )
------------------------------------------------------------
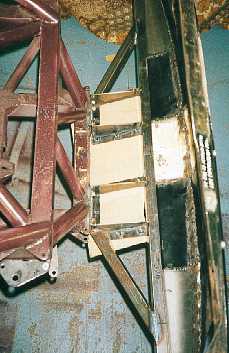
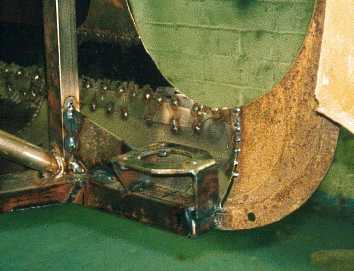
The support for the
front panel must also act as an under floor protector, lamp mounting,
towing bracket attachment and bumper mount. Therefore it is built strong.
This will be panelled underneath with 6mm aluminium alloy.
-----------------------------------------------------
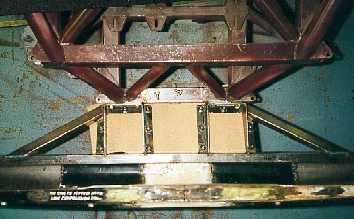
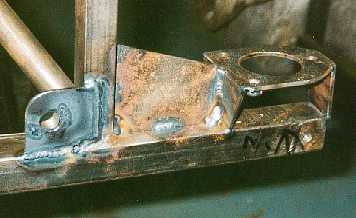
The front panel mount
from above. The mount has many threaded captives to allow attachment of
the under floor guard and front panel. I weld nuts to plate and weld them
into position. This is a lot of work and I may look into some method of
blind thread inserts.
------------------------------------------------------------
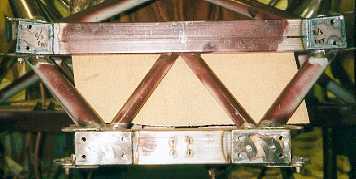
More captives, this
time to attach the front panel mounting bracket to the chassis. It would
have been easy to weld the structure to the chassis but I wanted it easily
replaceable in case of an accident.
-------------------------------------------------------------
The front light units
are self contained units. ( Like spot lamps.) This makes mounting much
easier as they fix to the chassis by just one big bolt. The front panel
will only be used to make a mould for a carbon fibre replica.
-----------------------------------------------------------
The lamp bracket
will take another plate above the plate you can see. This will allow for
height adjustment and allow the light unit to be removed and replaced
without upsetting the alignment of the beam. The captive on the left will
allow a bumper mount to be screwed in.
-----------------------------------------------------------
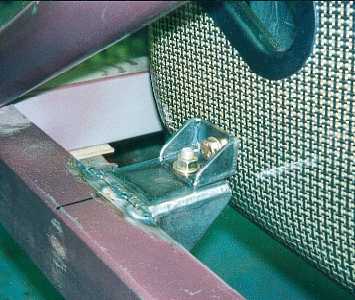
The seat mount is
designed to be as simple as possible and allow fast removal of the seat.
The seat can be removed by undoing the nut on the chassis bracket and
lifting out the seat.
------------------------------------------------------------
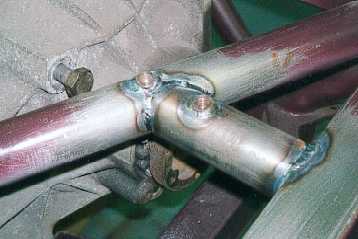
This is the top mounting
for the diff. The tubes are tapped and go through the tubes.
-----------------------------------------------------------
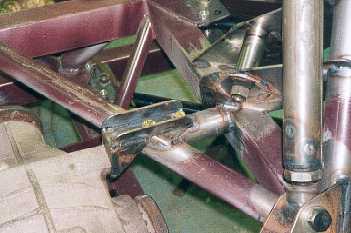
A plate is welded
to the top of the tubes.
---------------------------------------------------------
The finished mount
acts like a crossmember tying the rocker mounts together.
---------------------------------------------------------